Smart Ways to Organize Your First Aid Kit

Categorizing by Injury Type
Using Transparent Pouches for Visibility
Separating Consumables and Tools
Weight-Efficient Packing Strategies
This guide covers how to build, sort, and maintain a high-functioning first aid kit for outdoor excursions. You'll learn how to categorize supplies by injury type, choose the right containment systems, and ensure you aren't carrying useless weight. A disorganized kit is often as useless as no kit at all when things go sideways.
How Should You Organize a First Aid Kit?
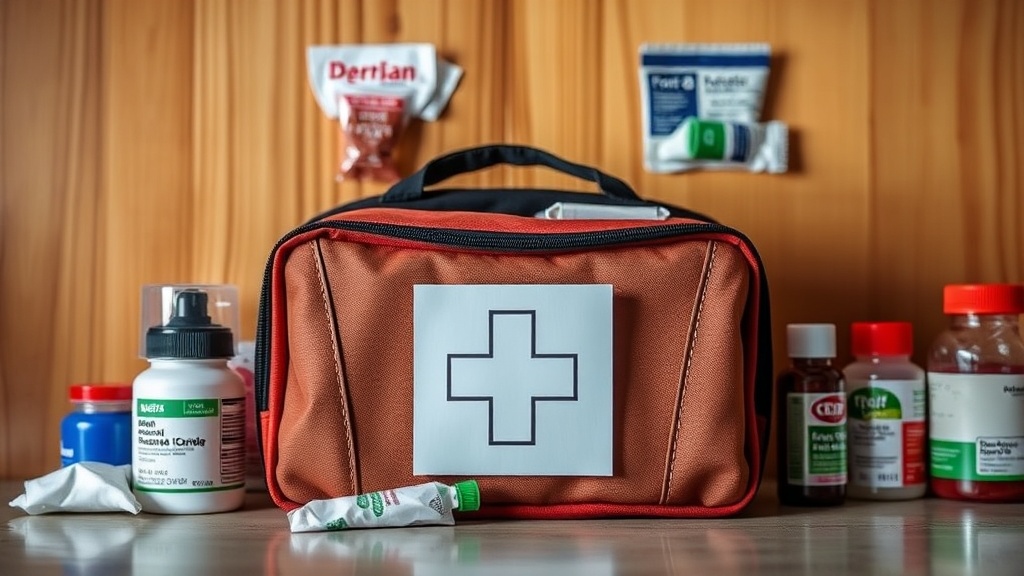
Organizing a first aid kit effectively requires a modular approach based on specific injury categories rather than one large, messy bag. You want to be able to grab exactly what you need without digging through a pile of loose bandages. The best way to do this is through the use of color-coded, transparent pouches or labeled sub-containers.
Think about the different scenarios you might face out in the wild. Are you hiking a well-traveled trail or heading into deep backcountry? Your organization should reflect that level of risk.
For most hikers, a modular system works best. You might have one small pouch for wound care, another for medications, and perhaps a third for tools. This prevents you from accidentally pulling out a bottle of ibuprofen when you actually need a sterile gauze pad. It's a simple distinction, but it saves precious seconds when you're stressed.
The Modular Breakdown
I've found that grouping items by function is the only way to stay sane during a minor medical event. Here is how I suggest breaking down your sub-kits:
- Wound Care: Bandages, sterile gauze, medical tape, antiseptic wipes, and antibiotic ointment.
- Medications: Pain relievers (like Advil or Tylenol), antihistamines, and anti-diarrheal medication.
- Trauma & Bleeding: Pressure bandages, tourniquet (if trained), and clotting agents.
- Tools & Diagnostics: Tweezers, medical shears, a thermometer, and a small flashlight.
- Skin & Environmental: Sunscreen, hydrocortisone cream, and bug relief.
If you're a minimalist, you might combine these. But if you're heading out for a multi-day trek, keeping them separate is a smart move. It also makes it much easier to see when you're running low on a specific item—a detail many people overlook until they're actually in the field.
What Are the Best First Aid Kits for Backpacking?
The best first aid kit for backpacking is one that balances specialized medical supplies with the weight constraints of your specific trip. There isn't a single "perfect" kit; instead, you should choose a kit that matches your activity level and environment.
If you're a beginner, you might want to look at pre-made kits from reputable brands like Adventure Medical Kits. These are great because they come with a baseline of supplies that are already vetted for weight and utility. However, if you're an experienced trekker, you'll likely want to build a custom kit from scratch to avoid the "filler" items that often come in pre-packaged sets.
For those who want a middle ground, I often recommend buying high-quality individual components and grouping them yourself. It's much more efficient than carrying a bulky, generic kit. For instance, instead of a giant box of assorted bandages, just grab a handful of Curad adhesive bandages and a roll of Leukotape. (Leukotape is a lifesaver for preventing blisters—much better than standard medical tape.)
| Kit Type | Best For | Pros | Cons |
|---|---|---|---|
| Pre-Made (e.g., Adventure Medical) | Day Hikers / Beginners | Ready to go immediately; compact. | Contains unnecessary "filler" items. |
| Custom Modular Kit | Backpackers / Long Distance | Exactly what you need; lightweight. | Requires time to build and update. |
| Professional/Expedition Kit | Guides / Search & Rescue | Comprehensive; handles major trauma. | Heavy and bulky; high cost. |
Don't forget that your gear needs to be accessible. If your kit is buried at the bottom of your pack, it's useless. I always keep my medical kit in an outer pocket or a top-access compartment. If you're also dealing with foot issues, you might want to check out how to select better socks to prevent the very blisters your kit is meant to treat.
How Do You Maintain Your Medical Supplies?
Maintaining your first aid kit involves regular inspections to check for expired medications and damaged packaging. You should perform a "kit audit" at the start of every hiking season to ensure everything is still functional and safe to use.
It's easy to forget that many medical items have shelf lives. Antiseptic wipes can dry out, and certain medications lose potency over time. If you find a crushed tube of ointment or a dried-out wipe, toss it. Don't risk it. It's better to carry a replacement than to rely on something that won't work when you need it.
The weather can be brutal on your supplies. If you're hiking in high heat, your ointments might separate or melt. If you're in freezing temperatures, some liquids might crystallize. Keep your kit in a stable environment when you aren't using it. Even a simple insulated pouch can help protect your supplies from extreme temperature swings.
One thing to watch out for is the "forgotten" item. I once went on a trip and realized my tweezers were broken. It sounds small, but if you step on a splinter or get a thorn in your foot, that's a massive problem. Always check your tools—like your medical shears or tweezers—to ensure they actually work before you leave the house.
The Checklist for Regular Maintenance
- Check Expiration Dates: Look at every single pill bottle and ointment tube.
- Inspect Packaging: Ensure seals are intact and nothing is torn or leaking.
- Test Tools: Make sure your scissors can actually cut through gauze and your tweezers grip well.
- Replenish Used Items: If you used a bandage on a minor scratch during your last trip, put a new one in immediately.
- Weight Check: Ensure you haven't added unnecessary bulk that makes your pack heavier than it needs to be.
A well-maintained kit is a confidence builder. When you know your gear is ready, you can focus more on the trail and less on "what-ifs." This is especially true when dealing with things like water safety. For instance, understanding rapid water treatment is a different kind of preparedness, but it falls under the same umbrella of being ready for the unexpected.
If you're often out in the woods, you might also find yourself dealing with minor burns or environmental exposure. Having a dedicated way to organize these specific items—perhaps a small, waterproof pouch—is a great idea. It keeps your supplies dry even if you're caught in a downpour. Speaking of rain, if you're worried about your gear getting damp, you might want to look into keeping your fire burning in damp conditions to stay warm and dry.
Don't overthink the complexity. Start with a small, organized pouch and grow it as you gain experience. The goal isn't to carry a pharmacy; it's to carry the right tools to manage a situation until you can get back to safety.
"The best kit is the one you actually have access to when the situation demands it."
Always keep your kit in a predictable location. Whether it's a specific side pocket of your pack or a dedicated compartment in your gear loft, you shouldn't have to think about where it is. You should just reach and grab. If you're a seasoned pro, you'll probably have a much more complex setup than a casual hiker, but the principle remains the same: organization is your best defense against chaos.